Slider

DIY erasers

Friday, August 19, 2016


Happy #DIYFRIDAY !

We ( I...ME..Jordyn and Zeke are doing nothing..)  are so busy with back to school prep but I want to share a quick DIY with you guys! These DIY eraser are so fun and easy to make. Jordyn had a blast and she's so excited to take these to school and use them. 

Like I said, these are pretty quick to whip up so lets get started!


WHAT YOU NEED:
Sculpey eraser clay ( I got mine from Michaels)
baking sheet
WHAT YOU DO:
1: preheat oven to 250 degrees
2: Break off pieces of eraser clay in your desired colors and form the shapes you want. 
3: place on a baking sheet and bake as instructed on package. ( 20 mins.)
4: Let cool completely before use.

Thats it!...SO easy. Ours turned out great but here is a few tips to help yours turn out a little better:

1: When mixing colors, fold colors in gently and don't knead too much, the dominant color will take over and instead of a blended look, you'll end up with one flat color. 
2: The package says to bake for 20 mins but ours are a little hard, I suggest checking your erasers around the 15 minute mark. 
3: Glitter is not included so if you want a little sparkle, you'll have to add your own. 

This is such a quick and easy back to school craft!

Xo, Jeanice :)

MINI HOMEWORK STATION

Friday, August 12, 2016

Happy #DIYFRIDAY

 How has everyones week been? We're crazy busy over here preparing for back to school. Is non-pregnancy nesting a thing? Because I think I have it. 
Seriously. All of a sudden i'm organizing everything.....Like, I have this crazy overwhelming desire to get my home prepared and organized. But, not for a baby...for the new school year. HA!
So, with the nesting...came the urge to figure out a solution for Jordyns homework situation. See, Jordyn has a desk.....that is mainly used for collecting random items because she literally does not use it. She does her homework on the kitchen table so throughout the year there is homework and paperwork scattered all over the table and i'm constantly organizing it. I looked up a few different options for homework stations, most of which didn't work for me. I have one child so I didn't need a huge space or desk area. I decided to create a little caddy that would sit on the kitchen table. 

Although this isn't a craft, this is such a quick #DIY project that'll help you stay organized this school year! 


Most of the supplies I purchased are from Target and Staples. I'm using a magazine holder with an adhesive label attached as a place for Jordyn to  drop any papers that need to be signed....I don't even want to get into how many "important"papers got lost last year. lol.


Isn't this ruler box adorable? It's perfect for storing glue, tape, and notebooks! These glass jars are from the Dollar spot. The short one is perfect for storing all of her fun erasers..I mean, lets just look at those macaroons! SO CUTE!
That rainbow note pad and that ice cream pen is giving me all the happiness right now! ugh. 
I organized everything on a serving tray and it now sits in the middle of the dining table, which we never actually use to dine on. lol. 
This #DIY took me all of 10 minutes and 20 dollars. 

I'm curious,  where do your kiddos do their homework during the school year?

Xo, Jeanice

DIY Kool-aid lip balm

Friday, August 5, 2016


Happy #DIYFRIDAY

If you follow me on Snapchat ( Jeanicewebb) you know that last week Jordyn and I made these kool-aid lip balms, today i'm sharing all the details! I let Jordyn decide what craft she wants to make every week and she decided on lip balm. I saw quite a few lip balm DIYs made with vaseline but I wasn't completely sure about it since I don't like the feel of vaseline. I came across a few recipes that called for coconut oil and beeswax and I was sold! 

Here's what you need.
SUPPLIES 
coconut oil.
small measuring cup or funnel
lip balm tubes or small pots


And here's what you do!

1: Start by measuring out about 1/4 tsp of each kook-aid flavor into different containers. 

2: Melt your beeswax in the microwave at 30 second intervals until completely melted. You won't need to heat up the coconut oil, it should liquify once it comes in contact with the hot beeswax. For measurements you want to keep a 2:1 ratio of coconut oil to beeswax. 
We made 6 tubes but for each tube we measured out 2 tsp of coconut oil to 1 tsp of beeswax. 


3: pour your hot mixture into the individual containers you prepared and stir.

4: use your small measuring cup to pour each mixture into its tube, rinsing between each color. Let sit for about 5 minutes until they harden!

These were super fun and simple to make but here's a few tips to help you make yours even better;

1: the colors will be very pale, add a few drops of water to activate the cool crystals to make the colors more vibrant.
2: The grape Kool-aid turns a REALLY dark black color...i'd skip this one. 
3: the Kool-aid is bit sour, so maybe add in a little sugar if you're not a fan of sour, Jordyn likes it so we didn't. 
4: These will tint the lips, so while the crazy colors are fun to make...keep that in mind. 
5: Keep the 2:1 ratio...if you add more beeswax, the lip balm will be too firm and will be harder to spread on your lips. 


Xo, Jeanice 

D.I.Y FRIDAY: CELL PHONE CASES USING DECO FRENZY DECORATING MOUSSE

Friday, July 29, 2016

Happy #DIYFRIDAY ! 

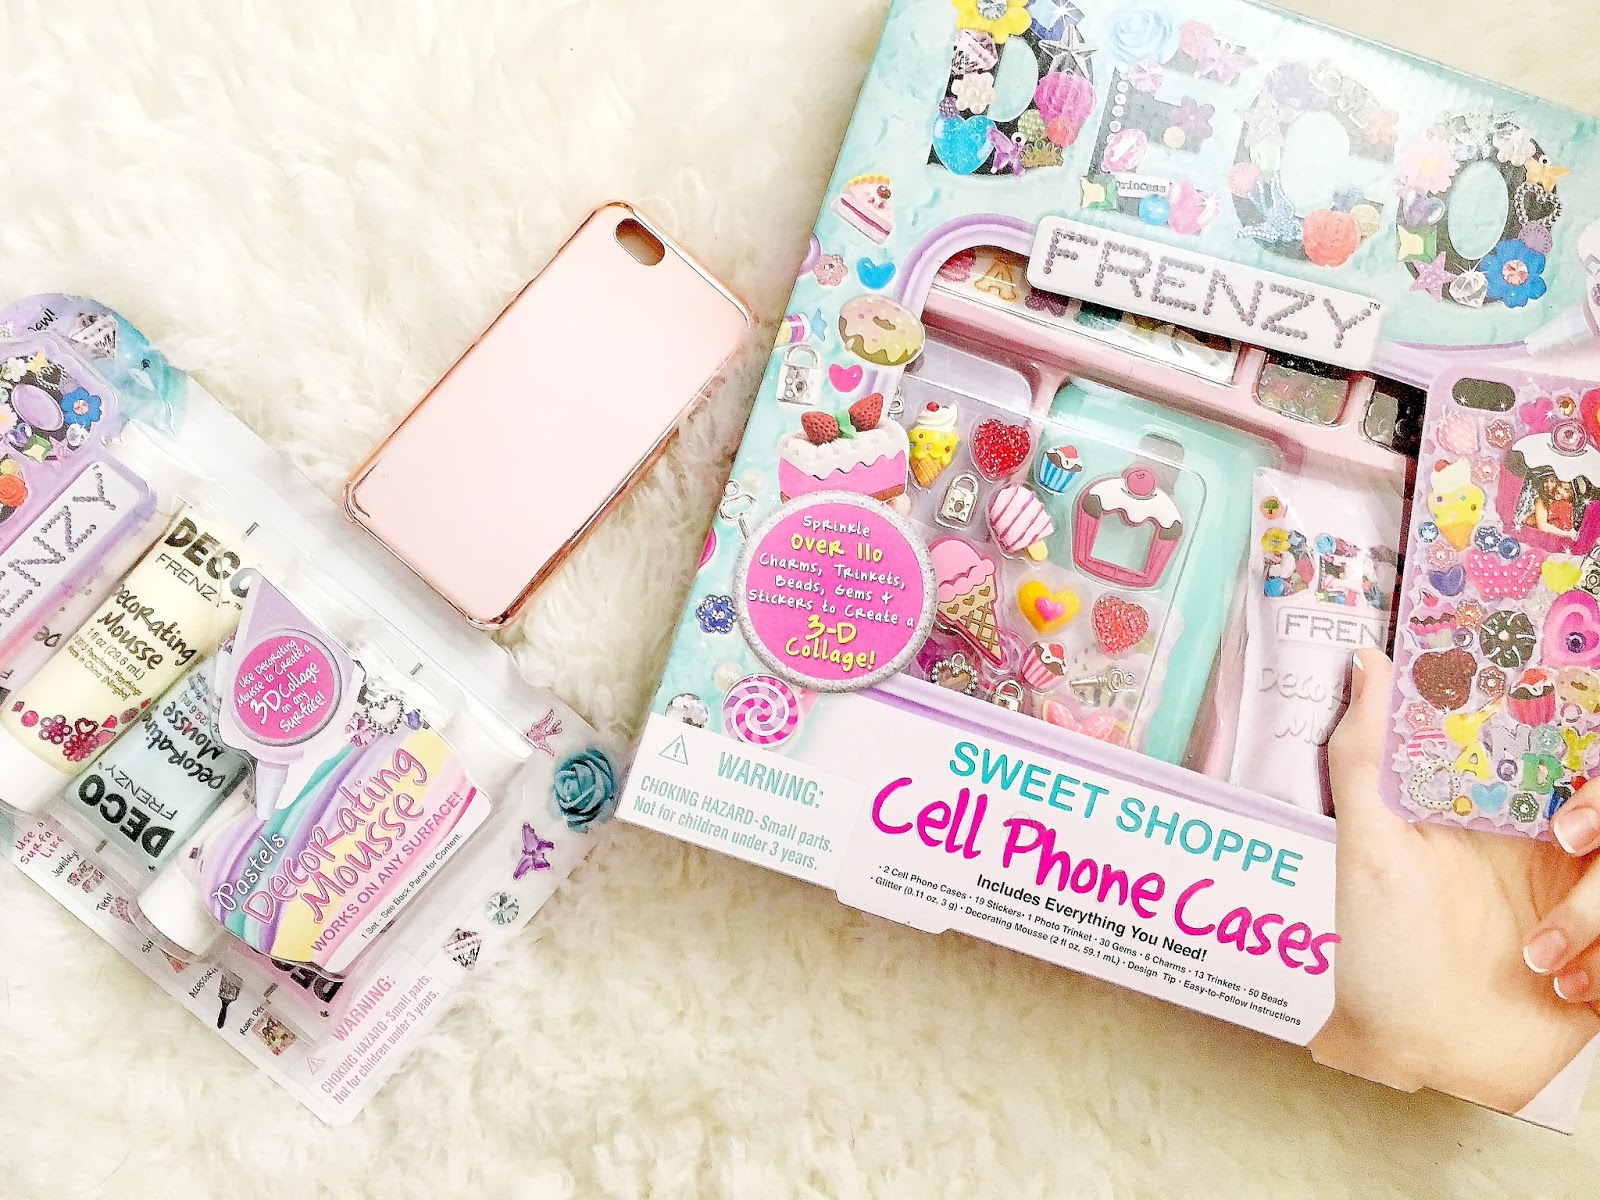
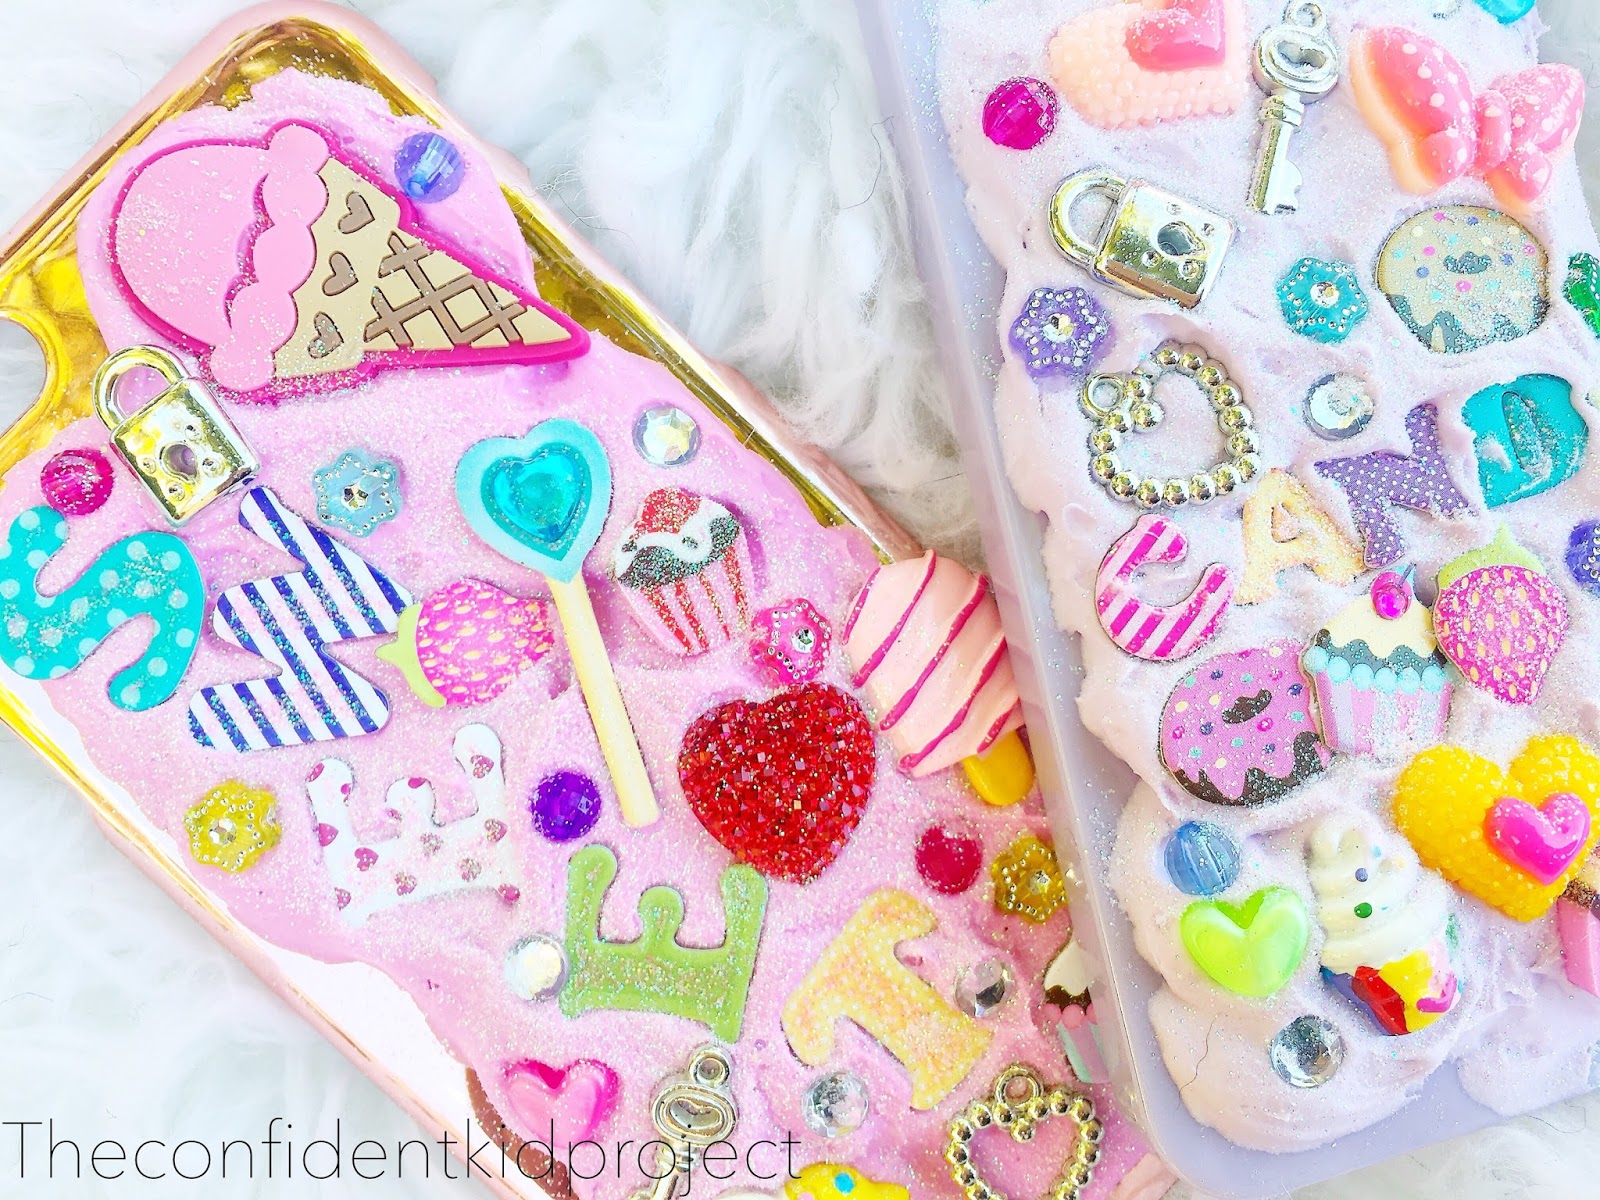
Last week Jordyn and I made these super adorable phone cases using Deco Frenzy decorating mousse.
I picked these up at Michaels . The sweet shoppe cell phone cases pack was originally $14.99 but I used a 40% off coupon!..I also picked up the extra pack of pastel decorating mousse colors for $7.99.

This stuff is really pretty cool, the decorating mouse is like a light whipped....well.....mousse, for lack of a better word,  that hardens over time to permanently set any decorations you add on top of it. It's really fun and easy and you can pretty much decorate any hard surface you'd like. The decorating kit I purchased came with 2 cell phone cases; iPhone 5 and a galaxy 5s ( we didn't use that one, instead I used a plain plastic iPhone 6s case I had for my phone.) along with tons of stickers, jewels, and trinkets to decorate with. 

The mousse comes in a packet very similar to those decorating frosting packets so you can just squeeze the mousse onto the phone case. The mousse packet has a star type decorating tip but Jordyn and I found it a little hard to actually get the mousse to come out as a star...maybe it's user error but it just didn't work for us. Instead we went kind of just squeezed the mousse onto the phone cases and swirled it around a little, making it look fluffy and cloud like..
Then we just added our stickers and charms...sprinkled some glitter on and let it dry overnight!
The box says it should be fully dry in 1-2 hours but to let completely set for 24 hours.

Happy crafting!
Xo, Jeanice 

DIY FRIDAY: Gotta Catch 'em All, Pokemon flair pins.

Friday, July 22, 2016


Raise your hand if you're playing Pokemon Go....
*oh,....me either. wink, wink.

But seriously, Jordyn has recently become OBSESSED with this game and i've got to admit, it is super fun! It seems like we go out almost every night to walk around the park and catch Pokemon. It really is amazing to see how many people are actually out, walking around, and spending time in public. 
Since Jordyn is on a mission to become a Pokemon master, we decided to create a little bit of Pokemon flair for her to wear. These are so cute and so easy to make! 

SUPPLIES;
Black permanent marker
markers or crayons
scissors
Hot glue gun.
Pin backs
Printed Pokemon stencils
STEP 1.
Start by preheating your oven to 325 degrees then doing a google image search for your favorite Pokemon and save them to your computer. You'll want to resize your Pokemon images to about 3x3. Print them off in black and white....to save ink, duh. Place your shrink plastic ( rough side up) over the images and trace with your permanent marker.
STEP 2: 
Color in your images. Jordyn and I used markers but you could also use acrylic paints, colored pencils, or crayons.

STEP 3: Cut out your images. Cut along the black line, there doesnt need to be any white space around the outside. 

STEP 4: SHRINK! Jordyn thought this part was so cool. Place your images on a baking sheet lined with either foil or parchment paper then place in the oven. Turn on your oven light to watch your images shrink, it'll take 1-3 minutes. Jordyns mind was blown, she couldn't stop talking about it. It really is fun to see how these big images get so tiny. ( They shrink to about 1/3 of the original size and become 9 times thicker) And don't worry, the shrink plastic will start to curl up while its shrinking but will flatten out once its done. 

STEP 5: Once your Pokemon are cool, use your hot glue gun to add the pin clips to the back ( rough side)

STEP 6: Pin to your outfit and go catch 'em all...with flair!


Xo, Jeanice

D.I.Y Friday: oven bake clay coasters

Friday, July 15, 2016


Happy Friday!

We made it through another week, yay for us!! To celebrate, here's another #DIYFRIDAY post. This week, Jordyn and I made oven bake clay coasters. I was scrolling on Pinterest and came across some similar coasters and died over how gorgeous they were!...I mean, look...how just how fun and bright and gorgeous they are! Not to mention, they're extremely simple to make. 

SUPPLIES:
Oven bake clay.
Glaze for sealing (optional.
Rolling Pin or large round jar.
Gold craft paint.
Small brush.
Cup with wide/sturdy rim.
Cutting board.
Xacto knife
Baking sheet.

WHAT YOU DO:


1: Roll out each color of clay you want to use into a thin snake. 
2: combine all colors and twist into one 
3: Roll twist into ball.
4: Use rolling pin or large round jar to roll out your ball. 
5: Use your cup as a guide and cut around the outside.
6: Place your marbled clay rounds on a baking sheet and bake according to package directions.
( Since I used Sculpey oven bake clay I baked mine at 275 degrees for 30 mins. It is important NOT to over bake your clay or it'll start to turn brown and the colors won't be as vibrant.)


Once your clay is completely cool use a small paintbrush to paint a few coats of gold around the outer rim. Allow paint to dry and seal with glaze if you desire. The glaze will give the coaster a glossy finish but is not totally necessary. If you choose to skip this step the coasters will have a more matte finish. 

Jordyn and I made these together so they're not completely perfect ( 8 year old cutting skills..) but we did it together so I love them! These are such a fun craft to make with kids and would be perfect to make as little gifts. Not to mention, the color possibilities are endless!

Happy crafting, 
Xo, Jeanice

D.I.Y Friday: Dream catchers

Friday, July 8, 2016


Happy #diyfriday! 

This week Jordyn and I made dream catchers and while I think they're beautiful, she is weirdly obsessed with them. Dream catchers are one of the most fascinating traditions of Native Americans.  Traditionally, dream catchers are intended to protect the sleeping from negative dreams. The good dreams slip through the holes of the dream catcher and glide down to the sleeping person below while the bad dreams get caught in the web and expire when the sun rays strike them.


Supplies:

-Wood embroidery hoops.
-yarn in multiple colors.
-felt in multiple colors.
-washi tape.
-beads ( we used pony beads)
-feathers.
- pom poms. (We used pom pom beads.)
- hot glue gun.
-scissors.
All supplies were purchased from MICHAELS


STEP 1:
Start by wrapping your wooden embroidery hoops with different colored washi tape. There are no rules here, have fun with your designs!


STEP 2:
Start wrapping your different colored yarn tightly around your embroidery hoop. Wrap your yarn in different directions to create different patterns. Make sure to wrap tightly or the yarn will slip. I helped Jordyn by placing my finger on pieces of the yarn around the hoop as she wrapped. Continue wrapping until you are happy with your design and then tie a knot to secure it.


STEP 3:
Tie strings of yarn to your hoop in different lengths and colors and then decorate!

We cut hearts out of our felt and used hot glue to add them and the feathers to the ends of our dream catchers.

We hot glued pieces of yard to the top of our dream catchers to create a loop for them to hang onto the wall with.


Happy crafting and sweet dreams!
Xo, Jeanice.

D.I.Y Friday: Patriotic canvas shoes

Friday, July 1, 2016

4th of July is Monday! Who else is excited? 
I know...I know....it's supposed to be all " Happy Birthday, America" but 
I mean really, who doesnt love the 4th because of bbqs, family,  and fireworks?!
And, of course,  a holiday wouldnt be a holiday if it didn't give us a reason to decorate or dress up. 
These patriotic canvas shoes are extremely cheap and really quick to make so if you're trying to figure out a way to pull your outfit together for the 4th, these are perfect.


SUPPLIES:
CANVAS SHOES: WALMART
RED & BLUE PERMANENT MARKERS: SHARPIE
WASHI TAPE & STAR STICKERS: MICHAELS


Use the washi tape and star stickers to stencil out where you want your stripes and stars on each shoe and then color in the blank spaces with your markers. 


When you peel off your stickers and tape your final design will be revealed!

These are so adorable and for less than 7 dollars you can afford to make a pair for every occasion! 
These would even be a fun craft for the kids to decorate on their own and come up with their own designs!

Hope you all have a fabulous 4th of July!

Xo, Jeanice
CopyRight © | Theme Designed By Hello Manhattan